Pages

Tuesday, August 27, 2013

Rolo Stuffed Peanut Butter Cookies

I know you'll forgive me for going AWOL once you see these marvelous cookies.


Pure peanut butter bliss stuffed with ooey gooey rolos. Peanut butter, caramel, and chocolate are a winning combination. 

The peanut butter cookie is very simple and it's a base recipe I've used before from sallysbakingaddiction.com (<love that blog!). It is the ultimate in soft, chewy, cookies with extreme peanut butter flavor. Mmm!


Now, what do you do when you have a winning cookie recipe? You stuff it with candy, duh! I totally adored the flavor combo and I know you will too. All you have to do is smoosh a rolo in one small piece of cookie dough, take another small piece of cookie dough to cover it, and roll it into a ball shape. Then bake for a few minutes and bada bing bada boom. A sneaky chocolate caramel surprise inside each and every cookie. And, here I am left with no more cookies but thoughts of cookies stuffed with mini Reese's. Oh dear.


 Rolo Stuffed Peanut Butter Cookies

Ingredients:

  • 1/2 cup butter or margarine, softened
  • 1/2 cup brown sugar
  • 1/4 cup sugar
  • 1 egg
  • 3/4 cup peanut butter
  • 1 tsp vanilla extract
  • 1/2 tsp baking soda
  • 1 1/4 cup flour
  • 24-30 rolos (depends on the size of your cookies)                                                                                         

 Directions:

  1. Cream the butter and sugars together on medium speed. Add the egg, peanut butter, and vanilla and mix until combined. 
  2. Mix in the baking soda and flour being careful not to overmix. Chill the dough for 30 minutes so it will be easier to handle. 
  3. Preheat oven to 350 degrees. Line a baking sheet with parchment or prepare with cooking spray. 
  4. Take about 1.5 tbsp of dough and split it in half. Stick a rolo candy in one half and top with the other half of dough. Seal the sides - I did this simply by rolling the dough into a ball shape with the rolo inside. Repeat with the rest of the dough. 
  5. Bake for 8-9 minutes. Allow to cool. 
  6. Enjoy!
Makes about 24 cookies. Recipe from  Sally's Baking Addictiona>.

Monday, June 17, 2013

Twix Cupcakes for Two!

I have a thing for cupcakes.


Big, decadent, over the top, gourmet cupcakes. I get so excited over all the possibilities. Cake flavors, frosting flavors, mix ins, crusts, toppings, decorating. And everyone gets a beautiful baby cake. What could be better?

I finally dove in and made a somewhat gourmet cupcake, although I can't wait to get even more decadent. But don't be afraid! It's really easy! It's just a matter of assembly. I also made just them just for two people - so easy!

Sans Toppings - still delicious!
 These cupcakes are rich, chocolate cake with a shortbread cookie base, caramel buttercream frosting and topped off with a twix bar and caramel drizzle. Try adding a little sea salt on top, too. Salty + sweet = win! Feel free to stick a caramel inside the chocolate cake but I thought that might be a bit overboard for my first fancy cupcake. ;)

Caramel Buttercream: The Making Of
The result is an amazing, rich, decadent, cupcake experience, not for the faint of heart. A twix cupcake. Or cuppie as I affectionately call them. Give it a whirl. By making just two cupcakes, the only thing you're risking is falling in love!

Note: I made two different recipes of cupcakes for two. The first batch had a better flavor but didn't rise well. The second batch was less rich in flavor but rose well and had a slightly better texture. Also, for some reason my cutesy little cupcake liners were very short so I ended up getting 3 from each batch. This may have affected the shortness of the first batch. I plan on experimenting more until I reach perfection. Stay tuned!

Chocolate Cupcakes for Two 

First Batch:

 Ingredients:

  •  3 Tbsp flour
  • 2 Tbsp sugar
  • 1 Tbsp cocoa powder
  • 1/8 tsp plus a pinch of baking soda
  • 1/16 tsp instant coffee powder
  • 3 Tbsp milk
  • 1 Tbsp vegetable oil
  • 1/2 tsp vanilla 
  • 2-3 shortbread cookies (optional - for twix cupcakes)

Directions:

  1. Preheat oven to 350 degrees. Line a cupcake or muffin tin with two or three cupcake liners (depending on size). Place a shortbread cookie in each liner.
  2.  In a medium bowl, whisk together the flour, sugar, cocoa powder, baking soda, and coffee powder. Add the milk, oil, and vanilla and mix until just combined.  Do not overmix. 
  3. Pour the batter on top of each shortbread cookie. Fill the tin about 3/4 way full or more. 
  4. Bake for 18-22 minutes. Test for doneness with a toothpick. If it comes out clean, they are done. You may also test for doneness by lightly pressing on a cupcake. If it "bounces back", they are done. 
  5. Cool 5 minutes in the tray, then remove to cool completely. 
Makes 2-3 cupcakes. These were richer, more chocolatey, and more dense and fudgy. They were very short as they didn't rise much. I plan on trying this recipe with a small amount of vinegar to spark the baking soda. Recipe adapted from An Edible Mosaic.

Batch 2

Ingredients:

  • 4 Tbsp flour
  • 3 Tbsp sugar
  • 1 Tbsp cocoa powder
  • 1/4 tsp baking soda
  • 1/8 tsp salt
  • 1/2 tsp vanilla
  • 1/2 tsp vinegar
  • 1 Tbsp vegetable oil
  • 3 Tbsp water
  • 2-3 shortbread cookies (optional - for twix cupcakes)

Directions:

  1. Preheat the oven to 350 degrees. Line a muffin or cupcake tin with 2-3 liners (depending on size). In each liner, place a shortbread cookie.
  2. In a medium bowl, combine flour, sugar, cocoa powder, baking soda, and salt. Add vanilla, vinegar, oil, and water. Stir until combined. Do not overmix. 
  3. Pour batter into 2-3 cupcake liners over the shortbread cookie. Bake for 15-18 minutes or until a toothpick comes out clean. 
Makes 2-3 cupcakes. These cupcakes had a less intense chocolate flavor but still had a good flavor. They rose well and had a good, moist cake texture. Recipe adapted from P.S. Heart.

Caramel Buttercream Frosting

Ingredients:

  • 4 Tbsp (1/2) stick butter, softened
  • 1 - 1 1/2 cups powdered sugar
  • 1-2 Tbsp caramel topping (depending on preference)
  • 1/2 tsp vanilla
  • 1/8 tsp salt 
  • milk, if needed to thin the frosting

 Directions:

  1. In a medium bowl, beat the butter until fluffy with a hand mixer. Gradually add in the powdered sugar and continue to beat. Add in the caramel topping, vanilla, and salt. Mix until combined. 
  2. If the frosting is too thick, add milk, 1 Tbsp at a time. If the frosting is too thin, add powdered sugar gradually. 
Makes enough to pipe frosting on approximately 6-8 cupcakes. This is much more than you'll need for two, however, it would be very difficult to make frosting in any smaller quantity. You may store frosting in a sealed bag in the refrigerator for up to five days or store in the freezer for up to 3 months. To use, simply thaw and whip the frosting.

Assembly of Twix Cupcakes

Now that you have a shortbread cookie base, and a chocolate cupcake, you've covered 2 of the 3 flavors of a twix bar. Finally, the caramel comes in via the frosting. Pipe the caramel buttercream onto each cupcake. Top with a piece of a twix bar. Finally, drizzle caramel sauce, chocolate sauce or both to top it off. Voila! Twix cupcakes!

(Alternatively you may follow the same method using your favorite cupcake recipe or box mix.)


Sunday, June 9, 2013

Copycat Minnie's Bake Shop Chocolate Chip Supreme Cookies

So I made cookies this weekend.


Twice. Not because they were so good I had to make more. Because I failed the first time. You win some, you lose some. The second batch was a win.


I went to Disney World about 2 weeks ago. I, sadly, missed my chance on a Minnie's Bake Shop Cookie. I was skeptical about their prepackaged selves. I later went online and found out that people are crazy for them. Of course. So I had to make a copycat to get a taste of what I was missing.


If these are anything like Minnie's version, then I know I want to try them next time I visit Disney World! They are huge. They are delicious. They are loaded with goodies and soft, tender and moist on the inside. They are not your average chocolate chip cookies. I used chocolate chunks and cut up twix bars in mine but feel free to use any morsels, nuts, or candy pieces you desire! The more the merrier!


I hope Minnie understands that imitation is the sincerest form of flattery. :)

Copycat Minnie's Bake Shop Chocolate Chip Supreme Cookies

Ingredients:

  • 1/2 cup (1 stick) butter or margarine, softened
  • 1/2 cup brown sugar
  • 6 Tbsp powdered sugar
  • 2 Tbsp egg, beaten
  • 1 Tbsp water
  • 1/2 tsp vanilla
  • 1 1/3 cup flour
  • 1/4 tsp salt
  • 1/4 tsp baking soda
  • 1 pack of 2 twix bars, cut up
  • 1/4 cup chocolate chunks

Directions:

  1. In a large bowl, cream together softened butter and sugars. Add the beaten egg, water, and vanilla. Beat just until combined. 
  2. Stir in flour, salt, and baking soda. Fold in the chocolate and candy pieces (or add-ins of your choice). 
  3. Line baking sheets with parchment paper. Use an ice cream scoop to scoop out mounds of dough onto the cookie sheet. They are large so you will only be able to fit 4-5 per sheet. Place the sheet with mounds of dough into the freezer. Chill in the freezer for 20 minutes. 
  4. Preheat the oven to 400 degrees. Remove the cookie sheet from freezer and place directly into the oven. Bake for 2 minutes. Reduce heat to 350 degrees and bake for an additional 15 minutes or until cookies are golden on the edges. Remove from oven. Allow to cool on the cookie sheet for 5 minutes. Remove from cookie sheet to cool completely. Eat up! 
 Makes about 7-8 large cookies. Adapted from The Disney Diner.

Tuesday, June 4, 2013

D.I.Y. Trail Mix


This is less of a recipe and more of an idea. Here's the idea: Make your own trail mix, packed with things you love, options that suit your diet, and at a fraction of the price.

I think it's a pretty good idea that I'm sure many people have had. I wanted to share my personal trail mix varieties to, hopefully, incite others to explore the world of DIY trail mix!

I call this version "Tropical Blend Trail Mix".


It's packed with banana chips (which I recently discovered I'm in love with and *bonus* they sell a big bag at the dollar tree!), sweetened coconut flakes, sunflower seeds, dry roasted peanuts, and butter toffee almonds. Yumm-o is all I have to say.

This next version is called "Sweet and Salty Mix". I know, so creative.


I loaded this one with dry roasted peanuts, sunflower seeds, chocolate chips, and lightly salted almonds. These are some of my favorite healthy snack foods. It's really fun to choose your personal favorites and find flavors that complement each other to develop a trail mix just for you.


Here are the exact measurements I used for my trail mixes:

Tropical Blend Trail Mix

Ingredients:

  • 1 Tbsp sunflower seeds
  • 20 dry roasted peanuts
  • 12 butter toffee almonds (blue diamond brand)
  • 3-4 Tbsp banana chips
  • 1 Tbsp coconut flakes 

Sweet and Salty Mix 

Ingredients:

  • 8 lightly salted almonds
  • 30 dry roasted peanuts
  • 1 Tbsp sunflower seeds
  • 15 chocolate chips

 Nutrition Information (Approximately)

Tropical Blend

Calories: 233
Fat: 14.6 g
Carbohydrates: 20.9 g
Protein: 7 g
Fiber: 3.8 g

Sweet and Salty Mix

Calories: 275
Fat: 22 g
Carbohydrates: 13.3 g
Protein: 9.9 g
Fiber: 3.9 g

*While the calories and fat may seem high, remember that it is good fat from nuts and sunflower seeds. Trail mix typically is very satisfying (so you don't get hungry quickly) and is packed with protein, fiber, and other vitamins.

Friday, May 31, 2013

3 Ingredient Cake Batter Ice Cream

Cake Batter. It's good stuff.


Do we ever tire of cake batter? I know I don't. So when I saw a recipe for 2 ingredient ice cream with no ice cream maker required, I really couldn't resist cake batter-izing it.

 The cake batter flavor shone through so wonderfully. It honestly tasted like I made cake batter and stuck it in the freezer. I will venture to say that this is the most cake battery cake batter treat I've ever encountered. And I've encountered quite a few cake batter treats in my day.  Pure. cake. batter. goodness. The sprinkles are necessary, of course. Funfetti ftw. And, I did add just a tiny splash of vanilla because vanilla makes everything almost everything better.

Extra Sprinkles, please and thank you.
 The process is so incredibly simple, it blows my mind. Why don't more people know about this?? One little can of evaporated milk, a cup or so of powdered sugar, and whatever flavoring or add-ins you want creates a soft, creamy ice cream that will amaze you.

The first step is to chill the can of evaporated milk overnight. This is vital to whipping it up into a creamy masterpiece. Then, you'll simply whip the evaporated milk, add powdered sugar, and, in this case, cake mix plus sprinkles, and whip until blended. Pop it in the freezer and take out to whip at 1 hour intervals. You'll probably have to do this about 5 times. It's actually kind of fun. I found myself wishing the hours would pass by faster so I could see what state my ice cream matter was in at the time.


I told you it was simple. My mind is swirling with possibilities. Peppermint extract + chocolate chips + green food coloring for mint chocolate chip. Vanilla extract for a classic, cocoa powder for chocolate, red velvet cake mix, other cake mixes, flavor it with duncan hines frosting creation packets (caramel, cotton candy, cinnamon roll, etc). Bah! Ice cream flavors are taking over my brain!


What are you waiting for? You may even have all the ingredients right in your house and the varieties are endless!

Cake Batter Ice Cream (No Ice Cream Maker Required!)

Ingredients:

  • 1 (12 oz) can evaporated milk 
  • 1 cup powdered sugar
  • 1/4 cup + 1 Tbsp cake mix (I used yellow)
  • 1/4 cup rainbow sprinkles (optional)
  • 1/4 tsp vanilla (optional)

Directions:

  1. Chill the can of evaporated (NOT sweetened condensed) milk in the fridge overnight. 
  2. In a large, freezer safe bowl, pour the chilled evaporated milk in. Using a mixer, whip it for 40-60 seconds. I whipped mine until the frothy bubbles were gone. 
  3. Add the powdered sugar, and cake mix. Beat until blended. Finally add the vanilla and sprinkles, if desired. Beat until mixed in. 
  4. Place the bowl in the freezer for 1 hour. Remove from the freezer and beat it for 1 minute. Return to freezer. Repeat this 4 more times. Freeze until set and store covered in the freezer. Enjoy!
Makes about 1 quart. Adapted from Crunchy Creamy Sweet.

*Note* If you choose to make a different flavor that relies on an extract or Duncan Hines flavor packet, up the powdered sugar to 1 1/4 cup. 

Thursday, May 30, 2013

Cake Batter Chocolate Chip Cookies

So there seems to be a cake batter craze going on.


I vote we keep this going for quite a while forever. Let's just say me and my mom have been known to make cake batter from a box with the sole purpose of eating the batter. We've gotten as few as 12 cupcakes from a box. So I guess you could say we're fans of cake batter. I like it more than cupcakes and cake itself. However, I don't recommend a diet of raw cake batter as it can be very risky with the salmonella business.


Whaddya say we get around that little roadblock by infusing chewy chocolate chip cookies with cake batter flavor and sprinkles (naturally).


Completely necessary. Did you know coldstone's cake batter ice cream doesn't have sprinkles in it. You have to add them in. How absurd.

Anyway. So these cookies are actually quite simple. It's a pretty basic cookie recipe but some of the flour is replaced with cake mix. Then, you mix in chocolate chips, white chocolate chips, and sprinkles, thus creating the happiest cookie dough I've ever seen.


Chill the dough and bada bing bada boom. Cake batter chocolate chip cookies. I couldn't resist eating one warm off the cookie sheet.  Quality control, of course. 


I used yellow cake mix as I feel it imparts a stronger cake batter taste, but feel free to try white if you wish. These cookies are soft, chewy, cake battery, and full of chocolate chips and sprinkles. So, to get your cake batter fix without the risk of salmonella - this is definitely the way to go.

"What do I do with all the leftover cake mix?" you say. Oh dear, sweet friend. The real difficulty is deciding from the medley of choices. I'm still trying to decide between Cake Batter Truffles, Cake Batter Fudge, or some type of homemade cake batter ice cream. There's also recipes for Cake Batter Pudding, Cake Batter Puppy Chow, and just take a look at this round-up: Cake Batter Round Up. Or of course, you may will want to make another batch of these cookies.

Cake Batter Chocolate Chip Cookies

Ingredients:

  • 1 1/4 cup flour
  • 1 1/4 cup cake mix (I used yellow)
  • 1/2 tsp baking soda
  • 3/4 cup butter or margarine (1.5 sticks), softened
  • 1/2 cup granulated sugar
  • 1/2 cup brown sugar
  • 1 egg
  • 1 1/2 tsp vanilla
  • 1/2 cup semi-sweet chocolate chips
  • 1/2 cup white chocolate chips
  • 1/2 cup rainbow sprinkles

Directions:

  1. In a large bowl, sift together the flour, cake mix, and baking soda. Be sure to get out the clumps in the cake mix.  In  a separate bowl, cream together the butter and sugars.  Add the egg and vanilla and beat until creamy. 
  2. Add the dry ingredients to the wet and mix until just combined. Do not overmix. Fold in the chocolate chips and sprinkles. 
  3. Cover and chill the dough for at least 1 hour and up to 4 days. 
  4. Preheat the oven to 350 degrees. 
  5. Put rounded tablespoons of dough on your cookie sheet. Try to make the cookie dough balls, taller than wide to reduce spreading. Keep the remaining dough in the fridge while a batch is baking. Bake for 10-12 minutes until edges are slightly golden brown. The middles may look slightly underdone. They will set up as the cookies cool.
  6. Allow the cookies to cool on the cookie sheet for about 4 minutes. Remove from cookie sheet to cool completely.  Enjoy!
Recipe from Sally's Baking Addiction. Makes about 3 dozen cookies. 


Monday, May 27, 2013

No Fail Banana Bread

Banana bread is an unparalleled experience.


It all starts with watching as your precious bananas turn from bright yellow to freckled to scary close to rotten. Isn't science fascinating?

Then, you get to take your rage out at the bananas. Poor, innocent bananas.


Get all nostalgic by mixing up simple ingredients to create a batter that tastes insanely good for something that looks like mush. Not that I lick the beater or anything.


Finally, the batter is poured into a bread pan which makes you feel all house-wifey because it's homemade bread. You watch through the oven door as the bread slowly rises and browns, filling the house with that familiar, soul warming aroma. The bread comes out and you wait. You wait until you just can't stand it anymore. Then you slice into the tender, dense, and moist bread. You ignore the steam escaping from between the slices, slather on some butter, and savor the first bite of your warm, unadulterated banana bread.

Bliss. And, if you're anything like me, you blissfully return to the loaf for seconds. And thirds. Until your dad comes and eats half a loaf in 2.4 seconds. Oh well. Maybe bliss should be shared.


Are you craving banana bread as much as I am now? This recipe is so simple. It contains just the basic ingredients: flour, sugar, bananas, baking soda, margarine, eggs, vanilla, and cinnamon. Surely you have most, if not all, of these ingredients in your kitchen right now. The batter is so quick to whip up. You'll be in banana bread heaven in no time. And so will your dad or whomever you choose shares in the bliss. With 4 ripe bananas, you're assured a sweet and moist bread every time. No need for yogurt or oil or brown sugar. The recipe I adapted from has 5 stars and 463 reviews - that's what I call no fail!

No Fail Banana Bread

Ingredients:

  • 1/2 cup (1 stick) margarine, softened
  • 1 cup granulated sugar
  • 2 eggs
  •  1/2 tsp vanilla
  • 4 ripe bananas, mashed
  • 1 1/2 cups flour
  • 1 tsp baking soda
  • 1/4 tsp cinnamon (or more to taste)

Directions:

  1. Preheat the oven to 350 degrees. Grease and flour a 9x5 loaf pan.
  2.  Cream together the softened margarine and sugar. Add the eggs, vanilla, and mashed banana. Mix until combined. 
  3. Add the flour, baking soda, and cinnamon. Mix until combined. Pour the batter into the prepared pan. 
  4. Bake for 55-60 minutes. Test for doneness with a toothpick or touch to see if it is firm. If the top is browning too much before it is done, cover with aluminum foil. Allow to cool for about 5-10 minutes in the pan. Turn it out of the pan for it to cool completely. Savor the experience!
Makes 1 9x5 inch loaf. Adapted from http://www.food.com/recipe/best-banana-bread-2886


Monday, May 20, 2013

Cinnamon Cheesecake Truffles

I've done it again.


One rainy Sunday evening, I paced around my house wondering what junk food I could stuff in my face before the weekend came to an abrupt end. Alas, all I seemed to find was....Cinnamon Cream Cheese Snack Delights.


 It's so delicious, it should be illegal. (I can say the same for the milk and dark chocolate but I have yet to try the white chocolate and caramel.) So, why isn't that a perfectly good choice? Well, I've already eaten it with about 500 mini pretzels. And, truth be told, the pretzels really just seemed to be getting in the way. What really sounded good to me was a graham cracker dipped in the stuff! Did I have graham crackers? No, no I did not. Did I have graham cracker crumbs? Yes, yes I did. So, I'll take the stuff, mix it together and cover it in white chocolate. That should suit my end-of-the-weekend-binge-craving.


I was right. And had extra chocolate to dip pretzels in. In this case, the pretzels do not get in the way. Rather, they complement the white chocolate quite nicely.


These truffles are cinnamony delights. I can't say enough about my love of truffles. I love the smooth, creamy, sweet interior, coated in a hard chocolate shell. Per. fect. ion. The cinnamon flavor really shines in these truffles. I thought about coating them with regular (semi-sweet chocolate chips) chocolate but I'm glad I went with white. The rich white chocolate balances out the cinnamon interior quite nicely.


Oh boy, do I wish I had made more than 2. Curse my small batch making self. Doesn't my self know that I need to end-of-the-weekend-binge?!

Good thing I have chocolate covered pretzels to comfort me. My advice: make these. And make more than two for goodness sake.

Cinnamon Truffles

Ingredients:

  • 1 Tbsp Snack Delights Cream Cheese Cinnamon flavor
  • 2 Tbsp graham cracker crumbs (or crush your own graham crackers, use cinnamon for extra cinnamon goodness)
  • melted white chocolate

Directions:

  1. Mix the cream cheese spread and graham cracker crumbs thoroughly. Form into balls about 1 inch in diameter. Place in fridge. 
  2. Prepare a tray with parchment paper for the finished truffles. 
  3. Melt white chocolate in 30 second intervals, stirring between each.  (For more tips on melting chocolate, see Chocolate Tips and Tricks.)
  4. Remove the balls from the fridge. Dip in the white chocolate, making sure to coat the entire ball. Place on the prepared tray with parchment. Allow to cool and harden. Place in the fridge to speed up the process. Enjoy!
Makes 2 truffles. Note: To make more just follow the same ratio. Example: 1/4 cup cream cheese, 1/2 cup graham cracker crumbs. That would make about 8 truffles. 1/2 cup cream cheese, 1 cup graham cracker crumbs would make about 16, etc. (1:2 ratio of cream cheese to crumbs). For 16 truffles, you would want about 5.5 oz of melted chocolate. Hope this helps to make more than 2! ;)

Thursday, May 16, 2013

Red Velvet Brownie Bites

I had a problem.


I'll share it with you because telling others about your problems is the only way to continue being a productive human being that will eventually discover the cure to cancer, end world hunger, and, inevitably, save the human race.

The human race is at stake here. So, my problem was this: a tub of cream cheese frosting that needed to be used up. I know, my life is rough. Cream cheese frosting brings me to....red velvet. What just so happened to be waiting in my pantry? A box of red velvet cake mix. It was 25 cents with a coupon. The coupons made me do it.

Alas, I did not have enough frosting for a cake or even cupcakes. I had to get creative.


Red velvet brownie bites to the rescue!

Quick, easy, rich, fudgy, cute little brownie bites were the canvas for my cream cheese frosting. Truly, a work of art. If you need to bring a dessert to a get-together, I recommend these. They are so fast to make! Unlike ordinary brownies, they only take about 8 minutes to bake! The "batter" comes together in a snap using the cake mix. No one will suspect how easy it was.

They won't even question it once they get a look at one of these cuties.


Oh, and not only is it a red velvet brownie topped with smooth cream cheese frosting, but it's also dotted with white chocolate chips. ;)

If, unlike me, you don't happen to be trying to use up a can of frosting, you could go for homemade! It's really not too difficult and tastes better than canned. (Sorry can, you're still delicious!) The frosting is not technicallyyy necessary and there are the white chips...

 but who are we kidding? You want the frosting.

Some of my brownies overflowed the mini muffin pan a wee bit too much and the tops fell off! :o Have no fear! I saved the day by turning the tops into a whoopie pie. That was my moment of genius for the year.


Seriously, so fudgy.

Make these. For the sake of humanity.

Step by step photos:

The lineup of ingredients, almost too simple:


In the oven, the mighty oven, the brownies bake tonight....


Red Velvet Brownie Bites

Ingredients:

  • 1 box red velvet cake mix (I used Duncan Hines)
  • 1/4 cup vegetable oil
  • 1/4 cup + 1 Tbsp milk
  • 1 egg
  • 1 tsp vanilla extract
  • 1/2 cup white chocolate chips (optional)
  • about 3/4 can of cream cheese frosting (optional)

Directions:

  1. Preheat the oven to 350 degrees. Spray a mini muffin pan with cooking spray or grease well. 
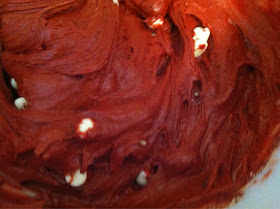
  2. In a large bowl, sift the cake mix to remove clumps. Add vegetable oil, milk, egg, and vanilla extract. Mix well. The batter will be very thick; use some elbow grease. Fold in white chocolate chips. 
  3. Place 1 Tbsp of "batter" (it's more of a cookie dough consistency) in each well. Bake for 8-10 minutes. The tops should look shiny and crackly. Allow the brownies to cool in the pan for about 5 minutes. Carefully remove from pan and allow to cool completely. 
  4. Once the brownie bites are cool, pipe or spread cream cheese frosting on top. Enjoy!
Makes about 27 brownie bites. Adapted from My Fair Baking.